A professional new build snagging survey typically costs between £300 and £600 for a standard two or three-bedroom house, rising to £700–£1,000+ for larger homes or apartments with complex services. That's a meaningful sum on top of an already stretched moving budget, which is why so many buyers ask the same question before they book one: can I just do this myself with a free checklist and save the money?
The honest answer is that it depends on your confidence, your time, the complexity of your home, and how much you're relying on the developer to fix problems quickly and without argument. This guide sets out exactly what you'll pay, what you get for it, what independent inspectors routinely find that owner-occupiers miss, and a practical framework for deciding whether a paid inspection makes financial sense for your specific purchase.
Snagging itself — identifying the small (and occasionally not so small) defects and unfinished details in a brand-new home — is a normal part of buying new build property in the UK. Even well-regarded builders working to NHBC, LABC or Premier Guarantee standards produce homes with some snags: a sticking door, a poorly caulked bath, paint spatter on a radiator, a loose kitchen plinth, uneven pointing. The question isn't whether your home will have any snags — it almost certainly will — but whether you, unaided, will spot all the ones worth reporting before your reporting window narrows.
We'll cover cost by property type and region, what's actually included in a typical professional visit, the gap between DIY and professional findings, how to pick a genuinely independent inspector, and when the New Homes Quality Code and your warranty provider come into the picture. If you're still deciding whether to reserve a plot at all, it's worth also reading how to read a new build floor plan before you reserve a plot so you understand the home you're inspecting.
What Does a Professional Snagging Survey Actually Cost?
Prices vary by inspector, region and property size, but most independent snagging companies in England and Wales price on a tiered scale based on bedroom count or floor area. As of 2026, typical ranges look like this — always check the current figure with your chosen inspector, as prices have been rising with demand and inflation.
| Property type | Typical professional snagging cost | Typical visit length |
|---|---|---|
| 1-bed flat / apartment | £250 – £400 | 1.5 – 2.5 hours |
| 2-bed house | £300 – £500 | 2 – 3 hours |
| 3-bed house | £350 – £600 | 3 – 4 hours |
| 4-bed+ house | £500 – £800 | 4 – 5.5 hours |
| Large detached / self-build finish | £700 – £1,200+ | 5+ hours |
Several things push the price up or down within these bands:
- Location – London and the South East typically sit at the top of each range; the Midlands, North and Scotland often come in lower.
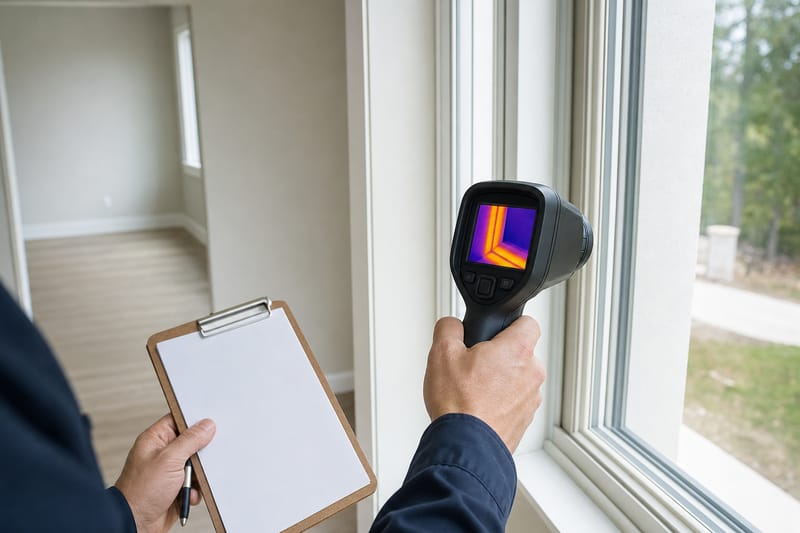
- Drone and thermal imaging add-ons – roof, gutter and render checks using a drone, or thermal imaging to spot insulation gaps and damp, usually add £75–£150.
- Second or follow-up visits – some inspectors include a free re-check once the developer has actioned the list; others charge £100–£150 for a return visit near the end of the two-year warranty period.
- New-build apartment blocks – communal area and external envelope issues can mean the inspector charges a slightly higher rate even for a one-bed unit, because shared systems add complexity.
Most reputable firms publish a fixed fee once they know the postcode and bedroom count, rather than quoting a day rate, which makes it easy to compare two or three inspectors before booking. Be wary of anyone significantly cheaper than the ranges above — a rushed one-hour visit on a four-bedroom house is unlikely to catch everything a thorough two-hour one would.
As a rule of thumb, budget roughly 0.1–0.15% of your purchase price for a professional snag inspection on a typical new build house — a small fraction of the cost of the defects it can help you get fixed for free.
What's Included in a Typical Professional Inspection
Independent snagging inspectors follow a structured process that's designed to be repeatable and defensible — not just a walk-round with a notepad. Knowing what's included helps you judge whether a quote represents good value.
Before the visit
- You'll usually be asked for the plot number, development name, builder, and ideally a copy of the floor plan or specification so the inspector knows what fixtures and finishes to expect.
- Most firms ask you to book the inspection for after legal completion, or during the period between practical completion and your move-in date if the developer allows access — timing is covered in more detail later in this guide.
On the day
- Room-by-room internal check – walls, ceilings, floors, skirting, architrave, doors, windows, sockets, switches and finishes checked systematically, often room by room against a standard template.
- Kitchen and bathroom detail – cupboard alignment, sealant lines, tiling, grout, worktop joints, appliance function and tap/waste operation.
- Services testing – extractor fans, trickle vents, radiators (bleeding and heat output), thermostat function, and sometimes a basic check of the consumer unit labelling.
- External check – render, brickwork, pointing, fencing, paths, drainage gullies, guttering (often via pole camera or drone), and garage or outbuilding finish where applicable.
- Loft inspection where accessible – insulation coverage, pipe lagging, and evidence of workmanship in areas the buyer would never normally see.
- Photographic evidence – every defect is photographed and referenced, not just described, which matters hugely when a developer disputes a claim.
After the visit
You should receive a formatted report, usually within 24–72 hours, listing every defect with a photo, location reference, and often a suggested priority (health and safety, cosmetic, functional). Many inspectors also provide a plain-English covering letter you can forward directly to your sales advisor or customer care team, and some offer guidance on how to phrase the email to the developer and what response timeframe to request under the New Homes Quality Code.
What Professionals Find That Most Buyers Miss
The real test of value isn't the fee — it's the gap between what you'd find walking round your own new home, excited and slightly overwhelmed, and what a trained inspector finds on the same property. That gap is usually larger than buyers expect, for a few consistent reasons.
They know where defects cluster
Experienced inspectors have seen the same handful of trades make the same handful of mistakes across hundreds of plots. They check specific pressure points as a matter of routine: the top corners of UPVC window frames for warping, the underside of kitchen worktops for unsealed joints, the back of radiators for paint overspray, loft hatch insulation, and the compression joints under baths and basins where leaks often start invisibly.
They test function, not just appearance
A buyer walking round tends to look. An inspector operates things: opening and closing every window and door to check for binding or draughts, running taps to check pressure and drainage, testing every socket with a plug-in tester, checking extractor fan airflow with tissue paper, and bleeding radiators to confirm even heat.
They catch things that aren't visible without tools
- A damp meter can flag moisture in walls or floors before it's visible as staining.
- A spirit level or laser line reveals out-of-true door frames, worktops and floors that look fine to the eye but will cause problems later (sticking doors, draining issues).
- A socket tester identifies wiring faults — reversed polarity, poor earthing — that look completely normal from the front plate.
- Thermal imaging, where used, can reveal missing or compressed loft and cavity insulation long before it shows up as an energy bill problem; this connects directly to the issues covered in overheating risk in new build homes, since poor insulation detailing cuts both ways.
They separate cosmetic from consequential
A DIY list tends to over-index on obvious cosmetic marks (paint splashes, scuffed skirting) and under-index on less visible but more expensive issues — a poorly sealed flat roof upstand, inadequate fall on a patio allowing water to pool against the DPC, or a soil pipe not properly vented. Professionals are trained to flag the second category even when it looks unremarkable, because that's where expensive post-warranty repairs tend to originate.
The value of a professional inspector often isn't in the quantity of snags found — it's in correctly identifying the handful that would have been expensive or disruptive to fix after your warranty window closed.
The DIY Alternative: What a Free Checklist Actually Gets You
Doing your own snagging costs nothing but time, and for a confident, methodical buyer with a free hour or two and a decent checklist, it can catch a genuinely useful proportion of defects — particularly the obvious cosmetic ones. It's worth being realistic about what DIY snagging does and doesn't achieve.
What DIY snagging does well
- Catches visible paint, plaster and finish defects — the things any attentive person would notice given time and daylight.
- Costs nothing and can be done at your own pace, including repeat visits before and after moving in.
- Builds your own familiarity with the house, which has value beyond the snag list itself.
- Works reasonably well on simpler properties — a straightforward two-bed terrace with a basic specification is less likely to hide complex services issues than a larger detached home or apartment with a communal plant room.
Where DIY snagging typically falls short
- Time pressure. Buyers usually do their own snagging during or just after a stressful completion day, often rushing because removal vans are waiting or children need settling — not the conditions for a methodical two-to-four-hour inspection.
- Emotional investment. It's genuinely harder to be critical of a home you've just bought and are excited about, especially on first viewing after completion.
- No tools. Few buyers own a damp meter, socket tester, laser level or thermal camera, so an entire category of hidden defects simply never gets checked.
- Unfamiliarity with standards. Buyers often don't know what "acceptable" tolerance looks like — is that gap under the door normal, or a sign the frame is out of square? Is that small crack in the plaster just settlement, or a sign of a structural movement issue worth escalating?
- No independent paper trail. A self-compiled list, however thorough, carries less weight with a developer's customer care team than a professionally formatted, dated, photo-referenced report from a named third party.
A free checklist is genuinely useful as a first pass — use one even if you also book a professional, since it helps you flag day-to-day niggles (a sticking drawer, a noisy fan) that build up after you've moved in and that an inspector visiting once won't necessarily catch on a single occupied day.
Professional vs DIY: A Direct Comparison
Putting the two approaches side by side makes the trade-off clearer. Neither is objectively "right" for every buyer — it depends on your circumstances, which the framework in the next section works through in detail.
| Factor | Professional snagging inspector | DIY with free checklist |
|---|---|---|
| Typical cost | £300 – £800 depending on size | Free (your time only) |
| Time required from you | 1–2 hours accompanying, or none if unaccompanied | Several hours, often spread over multiple visits |
| Tools used | Damp meter, socket tester, laser level, often drone/thermal camera | Eyes, phone camera, maybe a spirit level |
| Typical defects found | 40–150+ on an average house | Often 10–40, weighted toward cosmetic items |
| Hidden/functional defects | Routinely identified | Frequently missed |
| Report format | Formatted, dated, photo-referenced, independent | Informal notes or photos, self-compiled |
| Weight with developer/NHQB | Generally taken seriously as third-party evidence | Valid but can be more easily dismissed or deprioritised |
| Best suited to | First-time buyers, complex properties, time-poor buyers, investors buying unseen | Confident, hands-on buyers with simple properties and spare time |
Many experienced buyers take a blended approach: they do a careful DIY walk-round themselves in the days after moving in (noting everyday-use issues like noisy extractor fans or doors that catch) and separately commission a professional inspection, either instead of or alongside their own list, specifically to cover the hidden and functional defects they know they're not equipped to find. This also pairs well with understanding the build quality context around your plot — if you're buying a new build next to an active building site, for example, external defects from ongoing works nearby are worth a second, later-stage check too.
A Framework for Deciding If It's Worth Paying
Rather than a blanket yes or no, work through these questions for your specific purchase. The more "yes" answers, the stronger the case for paying for a professional inspection.
1. Is this your first new build purchase?
First-time new build buyers have no baseline for what "normal" finish quality looks like, and no experience interpreting a snag list or negotiating with a developer's customer care team. A professional report gives you both a benchmark and a template for how the process should run.
2. Is the property large, complex, or an apartment with shared services?
Bigger homes and flats with communal plant, lifts, or shared roofs have more places for defects to hide and more parties involved if something goes wrong. The cost-per-defect-found generally improves on larger, more complex properties.
3. How much time can you realistically give it?
If you're juggling a house move, possibly a chain, children, work and maybe a long-distance relocation, the honest time you have for a slow, methodical two-to-four-hour inspection on moving day is often close to zero. Paying someone to do it properly, on a day that isn't also your moving day, is often the better trade.
4. Are you buying off-plan or unseen?
If you haven't walked the specific plot multiple times during the build, or you're an investor or overseas buyer purchasing remotely, a professional inspection becomes close to essential — you have no other way of verifying the finished product matches what you paid for. This is especially relevant for buyers covered in new build mortgages for expats and non-UK residents, who may not be able to attend completion at all.
5. How much is riding on getting defects fixed before completion vs after?
Some developers prioritise pre-completion snagging reports because they want the sale to legally complete on schedule; post-completion lists sometimes get slower attention. A professional report delivered promptly, before you legally complete where your contract allows it, can carry more urgency.
6. What's your risk tolerance for missing something expensive?
If a missed defect — a leaking shower tray, a failed DPC detail, inadequate loft insulation — would cause you real financial or practical pain to fix later, the few hundred pounds for a professional check is cheap insurance against that risk.
When You Can Reasonably Skip a Professional Inspection
It's not a universal requirement, and there are genuine scenarios where a professional snagging survey adds less value than its cost.
- Very simple, small properties. A compact one-bed apartment with a basic specification and limited external elements gives a professional inspector less to find, proportionally, than a large detached house with a garage, garden and loft.
- You have relevant trade experience. If you or someone close to you works in construction, surveying, electrical or plumbing trades, you may already have both the knowledge and some of the tools to do a thorough DIY check yourself.
- You have time to inspect gradually. If you're not under pressure to report everything on day one — your contract or warranty period gives you a reasonable reporting window — you can build up a DIY list over the first few weeks of living in the home, which naturally surfaces functional issues (that fan really is too loud; that door really does stick when it's humid) that a one-off visit might miss anyway.
- Budget is genuinely tight after completion. Moving costs, furniture, stamp duty and solicitor fees already stretch most new build budgets thin. If a few hundred pounds would mean going without something more pressing, a careful, patient DIY approach using a thorough checklist and basic tools (a cheap socket tester and spirit level cost very little) is a reasonable compromise.
In these cases, the DIY approach works best when it's genuinely thorough rather than a quick walk-round: block out at least two to three uninterrupted hours, go room by room with a written checklist, open and close everything, run every tap and flush every toilet, and photograph anything uncertain so you can research or ask about it later. Cross-reference your list against your developer's own specification and sales brochure, and don't be shy about flagging things that just don't look or feel right — it's far easier to be told something is within tolerance than to raise it a year later and be told it's now "wear and tear."
Skipping a professional inspection is a reasonable budget decision, not a reckless one — provided you commit real time and a genuine checklist to doing it yourself, rather than a ten-minute glance on moving day.
How to Choose an Independent Snagging Inspector
Not all snagging services are equal, and the sector isn't tightly regulated in the way surveying or conveyancing is, so a little due diligence before booking pays off.
What to look for
- Genuine independence. The inspector should have no commercial relationship with the developer, builder or sales team on your development. Ask directly if they do any work for the builder in question — a reputable firm will tell you plainly.
- Relevant qualifications or trade background. Many good inspectors have backgrounds in building surveying, site management, NHBC inspection, or trades such as carpentry and electrics. Membership of a recognised professional body (for example, surveying bodies like RICS where the inspector is a qualified surveyor, or specialist snagging associations) is a useful but not essential signal — plenty of highly competent inspectors come from a hands-on construction background without a chartered title.
- Insurance. Ask whether they carry professional indemnity insurance, which protects you if their report is negligent or incomplete.
- Sample report. Any established inspector should be happy to show you an anonymised sample report before you book, so you can judge the level of detail and photo quality.
- Clear, fixed pricing. You should get a firm quote based on bedroom count and postcode before the visit, not a vague estimate that changes on the day.
- Reviews and track record. Independent reviews, ideally with some detail about the development or builder involved, are more useful than a generic star rating.
Questions worth asking before you book
- How long will the inspection take and will I receive the report the same day or within a set number of days?
- Do you use a damp meter, socket tester and laser level as standard, or are these extras?
- Can I attend the inspection, and will you explain findings to me on site?
- What happens if I disagree with how the developer responds to a listed item — do you offer follow-up advice?
- Is a re-inspection included once the developer has actioned the list, or charged separately?
Timing: When to Book Your Snagging Inspection
Timing affects both what an inspector can access and how much leverage you have to get defects fixed quickly.
| Stage | What's possible | Considerations |
|---|---|---|
| Pre-completion (if developer allows access) | Full inspection before you legally complete and pay | Not all developers allow this; where they do, it gives maximum leverage to request fixes before money changes hands |
| On or just after legal completion | Full inspection as soon as you have keys | Most common timing; some things (plaster drying, heating under real use) are harder to judge this early |
| 2–6 weeks after moving in | Full inspection plus early signs of settlement cracking, drying shrinkage, functional issues under normal use | Good balance — you've lived with the house briefly, but you're still well within early reporting windows |
| Around 10–11 months (near end of builder's defects period) | Final check before the typical 12-month developer liability period closes, catching anything missed first time | Many buyers book a second, shorter professional visit specifically for this — a "pre-anniversary" check |
| Near end of 2-year NHBC/warranty period | Check for issues that have emerged over time — damp, movement, settlement | Some inspectors offer a specific "two-year warranty check" service separate from initial snagging |
The two most common patterns among buyers who use a professional inspector are a single thorough visit shortly after moving in, or two visits: one early on and a shorter follow-up near the end of the builder's standard defects liability period (commonly around the 12-month mark, though this varies by developer and warranty provider). The second visit matters because some defects — minor settlement cracking, slow leaks, seal failures — simply haven't shown themselves yet in the first few weeks.
Whatever timing you choose, check your specific contract and warranty documents (NHBC Buildmark, LABC Warranty or Premier Guarantee terms, for example) for the exact reporting windows that apply, since "within the first two years" and "within the defects liability period" can mean different things depending on the item and the warranty provider.
Booking two shorter inspections — one early, one near the end of the builder's defects period — often finds more total value than one longer visit, because some defects simply haven't appeared yet on day one.
What Happens After the Report: Using It Effectively
A professional snagging report is only valuable if it actually leads to fixes. How you use it matters almost as much as the inspection itself.
Submitting it to the developer
- Send the full report (not a summary) to your site's customer care team, not just the sales office, and ask for written acknowledgement of receipt with a date.
- Ask for a realistic timeframe for each category of defect — cosmetic items are often grouped and actioned together; functional or safety items should be prioritised separately.
- Keep every email and photo exchange in one folder; if a dispute arises later, a clear paper trail matters more than memory.
If the developer disputes items
Some items in a report will be matters of professional judgement rather than fact — a slightly uneven finish that's within the industry's accepted tolerance, for example. A reputable inspector will often help interpret pushback from a developer and tell you honestly whether an item is reasonably disputable or worth escalating.
Escalation routes if fixes stall
- New Homes Quality Board (NHQB) – developers signed up to the New Homes Quality Code have obligations around responding to reasonable defect reports within set timeframes; check whether your builder is a member.
- Your warranty provider – NHBC, LABC Warranty and Premier Guarantee all have structured complaint and resolution processes if the builder itself won't engage, generally once you've exhausted the builder's own customer care route first.
- Your conveyancing solicitor – for anything that looks like it might breach the contract of sale rather than just a cosmetic finish issue, a brief message to the solicitor who handled your purchase can clarify your position.
Keep the report even after everything's fixed
A dated, photographed snagging report is useful evidence if a defect reappears later, if you later sell the property and a buyer's own survey flags something, or if you need to demonstrate to a warranty provider that an issue was raised within the correct timeframe. Store it alongside other key paperwork — your warranty certificate, specification document and completion statement.
Budgeting for Snagging Alongside Your Wider Moving Costs
A snagging inspection is a small but worthwhile line item in your overall new build budget, and it's easiest to plan for if you treat it as a fixed cost from the outset rather than an afterthought once you're already stretched by moving costs.
| Cost item | Typical range | When it's due |
|---|---|---|
| Professional snagging inspection | £300 – £800 | Shortly after completion |
| Follow-up/pre-anniversary re-inspection | £100 – £250 | Around 10–11 months post-completion |
| Basic DIY tools (socket tester, spirit level, damp meter) | £20 – £80 | One-off purchase if going DIY |
| Solicitor's fees | £1,200 – £2,500+ | At completion |
| Removals | £400 – £1,500+ | Moving day |
If budget is the main obstacle, remember you don't have to choose the most expensive inspector or the most comprehensive add-on package. A standard inspection without drone or thermal imaging add-ons, from a well-reviewed but modestly priced local firm, often delivers the bulk of the value at the lower end of the typical cost range. For a broader view of what your first year of ownership really costs, see the year one budget guide for new build running costs and how to calculate true monthly costs of a new build, both of which help you see where a snagging inspection sits relative to your other spending.
It's also worth checking whether your mortgage lender, conveyancer, or even the developer's incentive package includes anything relevant — some developers now offer a complimentary basic snagging visit or extended aftercare as part of their sales incentives, particularly on larger or slower-selling developments, though this shouldn't be relied upon to replace an independent check since a developer-arranged inspector is, by definition, not independent.
Treat the snagging inspection fee the same way you'd treat buildings insurance or a mortgage valuation — a small, planned cost that protects a much larger investment.
Frequently Asked Questions
How much does a professional snagging survey cost in the UK?
As of 2026, most independent snagging inspectors charge between £250 and £400 for a one-bed flat, £300–£600 for a typical two or three-bed house, and £500–£1,200+ for larger detached homes, with drone or thermal imaging add-ons typically costing an extra £75–£150. Always get a fixed quote based on your specific postcode and bedroom count, as prices vary by region and firm.
Is a snagging survey worth it on a new build?
For most buyers, yes — a professional inspection typically costs a few hundred pounds but routinely uncovers far more defects, including hidden functional ones, than an unaided buyer finds. It's particularly worth it for first-time buyers, larger or more complex properties, buyers purchasing off-plan or remotely, and anyone short on time around completion. It's a reasonable decision to skip one for a simple, small property if you commit real time to a thorough DIY check instead.
Can I snag my own new build house without paying for an inspector?
Yes, and many buyers do. Use a thorough written checklist, block out several uninterrupted hours, open and operate every door, window, tap and appliance, and photograph anything uncertain. You'll likely catch most cosmetic defects this way, though you're less likely to identify hidden issues like damp, wiring faults or insulation gaps without the tools and experience a professional brings.
What's the difference between snagging and a structural survey?
A snagging survey checks finish, fixtures and workmanship against the standard you'd reasonably expect from a newly completed home — it's not a structural assessment. A structural or building survey (such as a RICS Level 2 or 3 survey) assesses the building's fabric and structural condition and is more commonly used for older or resale properties, though some buyers also commission one on a new build if they have specific structural concerns.
When should I book my snagging inspection?
Many buyers book it as soon as possible after legal completion, while some developers also allow a pre-completion inspection. A second, shorter inspection near the end of the builder's defects liability period (often around 10–11 months) is also worthwhile, since some defects only become apparent after a few months of living in the home.
Will the developer definitely fix everything in a snagging report?
Not necessarily everything, but developers signed up to the New Homes Quality Code have obligations to respond to reasonable defect reports within set timeframes, and reputable builders generally want to resolve genuine defects to protect their reputation and NHQB rating. Items that are matters of judgement (within accepted tolerance) may be disputed; a professional inspector can usually tell you in advance which items are likely to be accepted without argument.
Does it matter if the inspector has a relationship with the developer?
Yes — always check the inspector has no commercial relationship with the builder or sales team on your development. A developer-arranged "goodwill" inspection isn't a substitute for a genuinely independent one, since the incentives for the inspector are different.
Is snagging covered by my new build warranty?
The inspection itself isn't covered by NHBC, LABC Warranty or Premier Guarantee — you pay for that separately. However, defects identified during the builder's own defects liability period (commonly the first two years) are generally the builder's responsibility to fix, and the structural warranty typically covers specific serious structural issues for a longer period, commonly up to ten years, subject to the policy terms.
Next Steps
Whether you decide to pay for a professional snagging inspection or do it yourself, the aim is the same: a thorough, well-documented list submitted to your developer in good time. A few places on the site can help you get there:
- Browse developments to check build quality ratings and buyer reviews before you reserve, so you know roughly what to expect from a given builder.
- Look up a builder's track record on builders before completion, including any public information on defect rates and customer satisfaction scores.
- Search properties for comparable new builds in your area if you're weighing up specification and finish quality across different sites.
- Use the map to understand a development's wider context — nearby infrastructure, phased building works, and other factors that can affect external snagging.
- Explore tools for budgeting calculators that help you plan for a snagging inspection alongside solicitor fees, removals and your first year of running costs.
- Use compare to weigh up two or three developments side by side, including build quality factors, before you commit to a reservation.
Once you've had your inspection — professional or DIY — keep the report safe alongside your warranty documents, specification sheet and completion paperwork. It's the single most useful document you'll have if any dispute arises with your developer, and it's worth revisiting again as the end of your builder's defects period and your two-year warranty checkpoint approach.