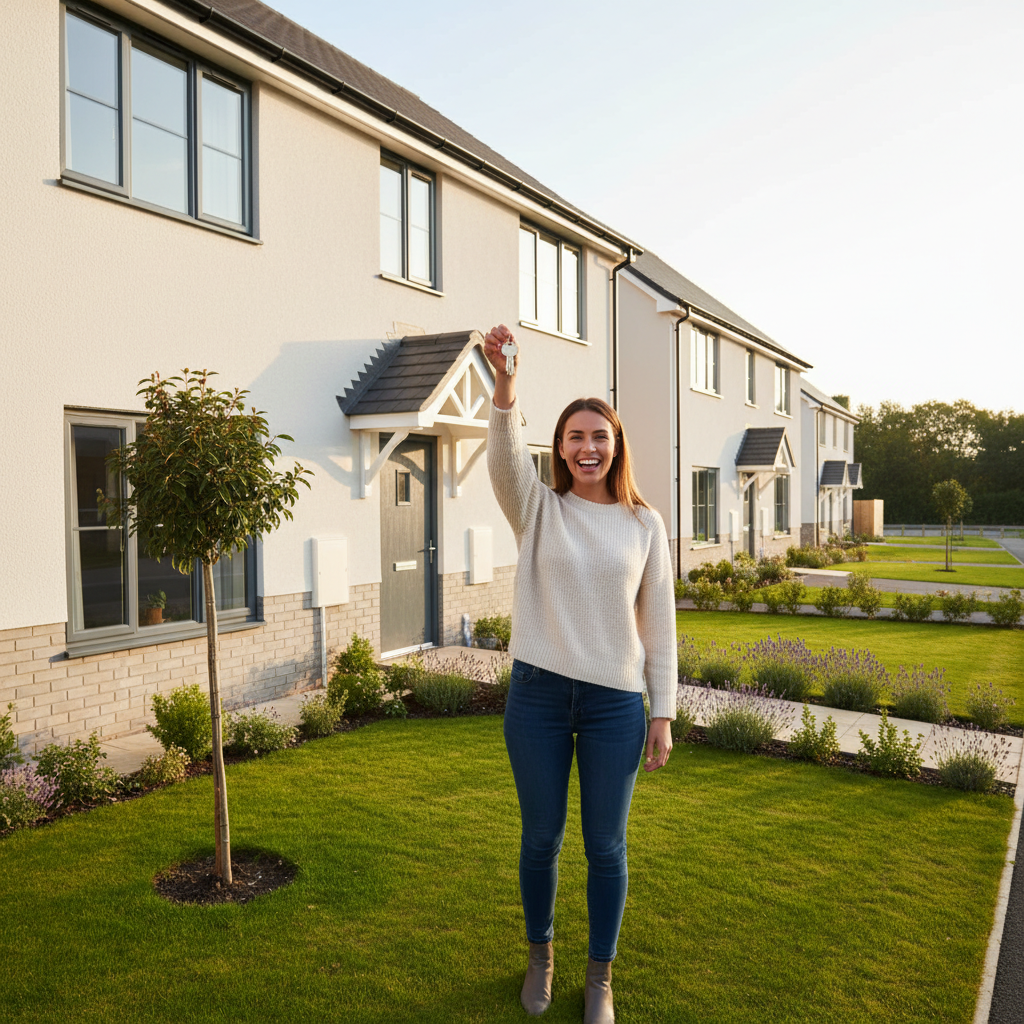
What Your Developer Typically Provides: The Standard Garden Specification
Before you can plan your garden improvements, you need to understand what your developer is contractually obligated to provide. This varies significantly between developers and between individual plots, so the first and most important step is to read your purchase contract carefully — specifically the landscaping specification or external works specification, which is usually included as an appendix or schedule to the main contract.
That said, there is a general pattern across most major UK developers (Barratt, Taylor Wimpey, Persimmon, Bellway, Redrow, David Wilson Homes, and others) for what is included as standard:
What Is Typically Included
Basic turfed lawn: Most developers will turf the rear garden as part of the standard specification. However, the quality of this turf varies enormously. In many cases, the turf is a basic utility-grade mix laid over a minimal layer of topsoil — sometimes as little as 50mm to 100mm deep — which has been spread over compacted subsoil or even construction rubble. The turf may be laid in poor conditions (too wet, too dry, or at the wrong time of year) and can look patchy, yellow, or waterlogged within weeks of moving in. Some developers only turf the main lawn area and leave side returns, borders, and awkward corners as bare earth.
Fence posts (but not always fence panels): This is one of the most surprising aspects of new build garden specifications. Many developers install concrete fence posts and gravel boards along the boundaries of your plot but leave you to install the actual fence panels yourself. The logic (from the developer's perspective) is that fence panels are easily damaged during ongoing construction work on neighbouring plots, so they defer panel installation until all surrounding homes are completed. Check your contract carefully — some developers include panels on certain boundaries but not others, and some include no panels at all.
A basic patio area: Many (but not all) developers include a small paved patio area immediately outside the rear patio doors. This is typically three to four metres deep by the width of the house, using standard concrete paving slabs (usually a basic grey or buff colour). The quality is functional rather than attractive, and many homeowners replace it within the first few years.
Boundary treatments: In addition to fence posts, the developer will provide whatever boundary treatment is specified in the planning permission for the estate. This might include close-board fencing on some boundaries, low walls on front boundaries, hedging along certain edges, or a combination of treatments. The planning conditions and estate management company rules often dictate what boundary treatments are permitted, so check these before making changes.
Drainage: The garden should have adequate drainage to prevent waterlogging, including connections to the estate's surface water drainage system. In practice, drainage on new build plots is a common source of complaints, as we will discuss later in this guide.
A path from front to back (sometimes): Some developers include a side path from the front of the house to the rear garden, while others leave this for the homeowner to create.
Front garden: The front garden is usually laid to turf, seeded, or a combination of turf and planting beds with basic shrubs. The developer is generally more attentive to front gardens because they are visible from the street and affect the estate's overall appearance during the selling period. On many estates, the front garden specification is governed by estate management company rules that dictate what you can and cannot change.
What Is Typically NOT Included
The list of what developers do not provide is rather longer than what they do provide, and this is where the costs mount up:
Decent topsoil: The topsoil provided by developers is often minimal in depth and poor in quality. It may be subsoil that has been screened and spread thinly, mixed with construction debris, or heavily compacted by machinery. Good garden soil needs to be at least 150mm to 200mm deep for a lawn and deeper for planting beds. You may need to import additional quality topsoil, which costs approximately £30 to £50 per cubic metre (or per bulk bag), with a typical rear garden needing 5 to 15 cubic metres to bring the soil to a decent standard.
Fence panels: As mentioned, many developers only install posts and gravel boards. You are responsible for purchasing and fitting fence panels, which costs approximately £25 to £45 per 1.83m (6ft) panel in closeboard or overlap style, plus fitting costs of £20 to £40 per panel if you hire a fencing contractor. For a typical rear garden with three boundaries, you might need 15 to 25 panels, bringing the total to approximately £700 to £2,100.
Proper landscaping: No flower beds, raised planters, ornamental borders, or structured planting. The garden is a blank canvas — which is both a challenge and an opportunity.
Mature planting: Any shrubs or hedging provided by the developer are typically small, juvenile specimens that will take several years to reach maturity. If you want instant impact with mature hedging, screening plants, or established shrubs, you will need to source and plant these yourself.
Storage shed or outbuilding: No developer includes a garden shed as standard. A basic 8x6 timber shed costs approximately £400 to £800, while a better quality shed (tongue-and-groove construction, pressure-treated timber, apex roof) costs £600 to £1,500. Installation adds £100 to £300. Larger sheds, workshops, or garden rooms are obviously more expensive — we will cover garden rooms later in this guide.
Pathways: Beyond the basic patio and any paths specified in the planning conditions, you are responsible for creating pathways around and through your garden.
Decking: No decking is included as standard by any major UK developer.
Garden lighting: Outdoor lighting is not typically included, though some developers install a basic PIR-activated security light on the rear of the house.
Garden tap: Some developers install an external water tap, but many do not. If one is not included, having a garden tap fitted by a plumber costs approximately £80 to £150. Alternatively, you can fit a DIY garden tap kit (such as those sold by Toolstation and Screwfix for around £20 to £30) to an existing internal water supply, though this requires basic plumbing skills.
Washing line or rotary dryer: Not included. A rotary dryer (such as the Brabantia Lift-O-Matic, approximately £60 to £100) with a ground socket costs about £80 to £120 total including installation.
When Can You Start Garden Work? Timing and Warranty Considerations
Before you rush out to buy turf, fencing, and patio materials, there are important timing considerations to understand.
Estate Completion and Ongoing Construction
If your home is on a development that is still under construction, the developer may restrict your ability to make garden changes until certain phases are complete. Construction traffic, crane operations, and access requirements for neighbouring plots can all affect your garden. Heavy vehicles may need to cross or access areas adjacent to your plot, and the developer typically retains rights of access across the estate until adoption is complete.
Check with your site manager before starting any significant garden work. In particular, find out whether the developer plans to access your garden for any remaining work on neighbouring properties, whether boundary fencing is complete or whether additional work is planned, whether the adopted highways and drainage are finished (as this can affect ground levels and drainage), and whether any communal landscaping adjacent to your plot is still to be completed.
NHBC Warranty and Garden Works
Your NHBC (or equivalent) warranty covers the structure of your home and certain external elements, but the garden itself has limited warranty coverage. The NHBC standard covers the preparation of the ground for gardens and landscaping, drainage within the plot boundary, retaining walls over 600mm high, and boundary walls that are part of the building structure. However, the warranty does not cover the quality of turf, the quality of topsoil, planting, fencing (unless it forms a structural boundary), or any landscaping work you carry out yourself after completion.
The key warranty consideration is this: if you carry out garden works that affect drainage, ground levels, or the building's foundations, you could void your structural warranty. Specifically, building a heavy structure (such as a large garden room, raised decking, or substantial retaining wall) within one metre of the house could affect the foundations and should be discussed with your warranty provider. Altering the ground levels around the house — particularly if you raise soil levels above the damp-proof course (DPC) — can cause damp problems and may void warranty claims related to damp. Modifying drainage within the plot boundary without proper design can cause waterlogging and affect the building's substructure.
For most standard garden improvements — laying a patio, building raised beds, installing fencing, planting, and turfing — there are no warranty implications, and you can proceed with confidence.
Best Time of Year for Garden Work
The optimal times for different garden tasks in the UK are as follows. Turfing is best done from late September to mid-November (autumn) or from March to April (spring). Avoid laying turf in midsummer (when it requires constant watering) or in the depths of winter (when the ground may be frozen or waterlogged). Patio and hard landscaping work can be done year-round but is most comfortable and practical from March to October when the ground is not frozen and daylight hours are longer. Planting of trees, shrubs, and hedging is best done from November to March (the dormant season), when plants establish root systems before spring growth. Container-grown plants can be planted year-round but establish best in autumn and spring. Fencing can be installed year-round. Seeding a lawn is best done in September (the ideal month for UK lawn seeding) or April to May.
Soil Quality Issues on New Build Sites: The Hidden Problem
Soil quality is arguably the biggest garden-related issue on new build developments, and it is one that is rarely discussed during the sales process. Understanding the problem — and how to address it — is essential if you want a garden that thrives rather than struggles.
Why New Build Soil Is Often Poor
During construction, the topsoil on your plot is stripped away (it is supposed to be stockpiled for reinstatement later, but this does not always happen). Heavy construction machinery — diggers, dumper trucks, cement mixers — then operates on the exposed subsoil for months or even years, compacting it to the point where it becomes almost impermeable. The water table may be disrupted by excavation and foundation work. Construction waste — fragments of brick, concrete, plasterboard, cable ties, nails, and other debris — often ends up mixed into the soil.
When the house is finished, the developer reinstates the garden area by spreading a layer of topsoil over the compacted subsoil. But this topsoil layer is frequently inadequate: sometimes only 50mm deep, and often of poor quality (it may be recycled subsoil rather than genuine topsoil, or it may be the original topsoil that was poorly stockpiled and has lost much of its fertility and structure).
The result is a garden where water sits on the surface rather than draining away (because the compacted subsoil beneath is impermeable), plants struggle to establish roots (because the soil is thin, compacted, and nutrient-poor), the turf goes yellow or brown within months (because the roots cannot penetrate the compacted layer beneath), and weeds thrive (because they are adapted to poor, disturbed soils).
How to Improve New Build Garden Soil
Addressing soil quality is the single most important investment you can make in your garden. Without decent soil, nothing else you do — planting, turfing, landscaping — will produce long-lasting results.
Step 1: Assess the soil. Dig several test holes around the garden, each about 300mm deep. Note the depth of the topsoil layer (it should ideally be 150mm or more), the condition of the subsoil beneath (is it heavily compacted clay, full of rubble, or relatively loose?), and how well water drains (fill the hole with water and time how long it takes to drain — if it takes more than an hour to drain 100mm of water, you have a drainage problem).
Step 2: Remove debris. Pick out any visible construction debris from the topsoil — broken bricks, concrete fragments, cable ties, plasterboard. If the soil is heavily contaminated with rubble, you may need to screen it (using a soil screening riddler, which can be hired for approximately £50 to £80 per day) or remove and replace it entirely.
Step 3: Break up compaction. If the subsoil beneath your topsoil is heavily compacted, it needs to be broken up to allow drainage and root penetration. For small areas, this can be done with a garden fork — push the fork in to its full depth and lever the soil to crack and loosen it, working across the entire area. For larger gardens, hiring a mini-digger (approximately £120 to £200 per day including delivery) or a rotavator (approximately £40 to £60 per day) is more practical. Be careful to avoid any buried services — check the as-built drawings from your developer for the locations of drainage pipes, water mains, electrical cables, and gas pipes.
Step 4: Improve the soil structure. Add organic matter to improve both clay and sandy soils. Well-rotted farmyard manure, garden compost, or composted green waste all improve soil structure, drainage, water retention, and nutrient content. Aim to incorporate a 50mm to 100mm layer of organic matter across the entire garden, forked or rotavated into the top 200mm of soil. Composted green waste is available from many local councils for approximately £25 to £40 per cubic metre. Well-rotted horse manure is often available free or cheaply from local stables — check listings on Facebook Marketplace or Gumtree.
Step 5: Add topsoil if needed. If your existing topsoil layer is less than 150mm deep, you will need to import additional topsoil. Quality screened topsoil costs approximately £30 to £50 per bulk bag (approximately 0.7 to 0.85 cubic metres), or £25 to £40 per tonne for loose bulk delivery. A typical rear garden of 60 to 80 square metres needs approximately 9 to 16 cubic metres (12 to 20 bulk bags) to add a 150mm layer. Total cost: approximately £300 to £800 for topsoil alone, plus delivery.
Step 6: Test and adjust pH. A soil pH test kit (approximately £5 to £10 from garden centres or Amazon) will tell you whether your soil is acidic, neutral, or alkaline. Most garden plants prefer a slightly acidic to neutral pH (6.0 to 7.0). If your soil is too acidic, add garden lime. If it is too alkaline, add sulphur chips or composted bark. Adjusting pH is a gradual process and may take a season to show results.
Drainage Problems and Solutions
Poor drainage is the most common garden complaint on new build developments, and it stems directly from the soil compaction issues discussed above. Symptoms include standing water on the lawn after rain, waterlogged borders and planting areas, moss taking over the lawn, and a persistent musty or stagnant smell from the garden.
When Drainage Is the Developer's Responsibility
If the drainage problem is caused by a defect in the plot's drainage system — for example, blocked or broken drain runs, incorrectly laid drainage, or failure to connect your plot's surface water drainage to the estate system — this is the developer's responsibility during the defects period (typically the first two years) and may also be covered by your NHBC warranty. Report any drainage issues to your developer in writing as soon as you notice them, with photographs and a description of the problem.
However, if the drainage problem is simply that the soil is compacted and does not drain well (which is extremely common), this is generally not considered a defect and the developer is unlikely to take responsibility. In this case, you will need to address it yourself.
DIY Drainage Solutions
Aeration: For lawns, regular aeration — using a hollow-tine aerator or a garden fork to create channels through the compacted soil — dramatically improves drainage. You can hire a motorised lawn aerator for approximately £40 to £60 per day, or buy a manual hollow-tine aerator for around £20 to £40. Aerate at least twice a year, in spring and autumn.
French drains: For more severe drainage problems, a French drain (also known as a soakaway drain) is an effective solution. This involves digging a trench (typically 300mm to 450mm wide and 600mm to 900mm deep), filling it with clean gravel, and laying a perforated drainage pipe along the bottom. The trench is then covered with a geotextile membrane and topped with soil or turf. Water flows into the gravel-filled trench and is carried away by the perforated pipe to a soakaway or the nearest surface water drain. A DIY French drain costs approximately £10 to £15 per linear metre in materials. For a 10 to 15 metre French drain across a standard rear garden, expect to spend £100 to £225 on materials. If you hire a contractor, the cost is approximately £40 to £80 per linear metre installed, bringing the total to £400 to £1,200.
Soakaways: A soakaway is a pit filled with rubble or specialist soakaway crates that collects surface water and allows it to percolate slowly into the ground. A standard garden soakaway costs approximately £200 to £500 to install professionally, or £50 to £150 in materials for a DIY installation. Soakaways work well in sandy or loamy soil but are less effective in heavy clay, where the water has nowhere to go.
Raised beds: If your garden soil is truly intractable — heavily compacted clay with poor drainage and no prospect of improvement without major earthworks — raised beds offer a practical workaround. By raising the planting level above the existing ground, you create a well-drained growing environment that is independent of the underlying soil. Raised beds can be constructed from timber (treated softwood railway sleeper-style planks, approximately £15 to £30 per plank), stone, brick, or galvanised steel. Fill with a mixture of quality topsoil and compost.
Garden Setup Costs: A Detailed Breakdown
Here is a comprehensive breakdown of the costs involved in setting up a typical new build rear garden in the UK in 2025-2026. These figures assume a standard rear garden for a three-bedroom semi-detached or detached house, approximately 60 to 100 square metres in total area.
Turf and Lawn
Removing and replacing developer turf: If the existing developer turf is in poor condition, you may need to lift it, improve the soil beneath, and re-turf. Turf lifting can be done by hand (hard work) or with a hired turf cutter (approximately £60 to £80 per day). Disposal of old turf: free if you can compost it on site, or approximately £100 to £200 for skip hire.
New turf: Quality lawn turf (such as Rolawn Medallion or County Turf Premium) costs approximately £4 to £7 per square metre. For a lawn area of 40 to 60 square metres, this costs £160 to £420. Delivery adds £30 to £60. If you hire a contractor to prepare the ground and lay the turf, add approximately £8 to £15 per square metre for labour, bringing the total to £500 to £1,300 for a professional turf installation.
Seeding (alternative to turf): Lawn seed is significantly cheaper than turf — approximately £3 to £8 per kilogram, with a sowing rate of 35 to 50 grams per square metre. For a 50 square metre lawn, you need approximately 2 to 2.5 kilograms of seed, costing £6 to £20. However, seeded lawns take 6 to 12 weeks to establish and require careful watering and weed management during this period. They are also more vulnerable to birds, cats, and dry weather than newly laid turf.
Total lawn cost range: £200 to £1,500 (DIY to professional installation).
Fencing
Fence panels: Closeboard fence panels (1.83m x 1.83m / 6ft x 6ft) cost approximately £25 to £45 each. Overlap panels are cheaper at £15 to £30 each but are less durable and less attractive. Contemporary slatted panels or hit-and-miss panels cost £40 to £80 each. For a typical rear garden with three fenced boundaries (approximately 25 to 35 linear metres), you need 14 to 19 panels, costing £350 to £1,520.
Fence posts (if not already installed by developer): Concrete fence posts cost approximately £12 to £18 each. Timber posts cost approximately £8 to £15 each but are less durable. You need one post per panel plus one for each end, so 15 to 20 posts for a typical garden. Cost: £120 to £360.
Gravel boards: Concrete gravel boards (placed at the bottom of the fence to prevent panels from contacting the ground) cost approximately £6 to £10 each. You need one per panel. Cost: £84 to £190.
Professional installation: A fencing contractor charges approximately £60 to £120 per panel for supply and installation of closeboard fencing (including posts, panels, and gravel boards). For a full garden perimeter of 14 to 19 panels, total professionally installed fencing costs £900 to £2,300.
Total fencing cost range: £500 to £3,000 (DIY to professional, basic to premium panels).
Patio
Concrete paving slabs: Basic concrete paving slabs (the cheapest option) cost approximately £15 to £25 per square metre for materials. A 15 to 20 square metre patio costs £225 to £500 in slabs alone.
Natural stone paving: Indian sandstone (the most popular natural stone for UK patios) costs approximately £25 to £50 per square metre. Limestone costs £35 to £60 per square metre. Granite costs £50 to £80 per square metre. Porcelain paving (an increasingly popular alternative to natural stone) costs £30 to £70 per square metre. For a 15 to 20 square metre patio, materials cost £375 to £1,400.
Installation costs: Professional patio installation (including excavation, sub-base preparation, laying, and pointing) costs approximately £80 to £150 per square metre, depending on the complexity and the paving material. For a 15 to 20 square metre patio, total installed costs range from £1,200 to £3,000.
Total patio cost range: £500 to £5,000 (DIY basic slabs to professionally installed premium stone).
Decking
Softwood decking: Pressure-treated softwood decking is the most affordable option, costing approximately £30 to £50 per square metre for materials. A 10 to 15 square metre deck costs £300 to £750 in materials.
Composite decking: Composite decking (made from a mixture of wood fibres and plastic) is more expensive but virtually maintenance-free, resistant to rot, and does not require annual treatment. Brands like Trex, Millboard, and Eva-Last cost approximately £60 to £150 per square metre for materials. Millboard, the premium market leader in the UK, costs approximately £90 to £150 per square metre. A 10 to 15 square metre composite deck costs £600 to £2,250 in materials.
Installation: Professional decking installation (including frame, joists, and laying) costs approximately £100 to £200 per square metre for softwood or £150 to £300 per square metre for composite.
Total decking cost range: £600 to £5,000 (DIY softwood to professionally installed composite).
Planting
Border plants: A well-stocked planting border costs approximately £30 to £60 per linear metre for plants, plus £10 to £20 per linear metre for mulch, membrane, and edging. For 10 to 20 linear metres of borders around a typical garden, expect to spend £400 to £1,600 on plants and materials.
Hedging: Hedge plants range from £3 to £15 each for bare-root specimens (available November to March) or £8 to £30 each for pot-grown. For a 10-metre hedge with plants spaced at 3 to 5 per linear metre, expect to spend £90 to £450 for bare-root or £240 to £900 for pot-grown. For instant hedging (mature hedging supplied in troughs for immediate impact), expect £100 to £250 per linear metre — a 10-metre instant hedge costs £1,000 to £2,500.
Trees: A standard ornamental tree (such as a Japanese maple, ornamental cherry, silver birch, or ornamental pear) costs £30 to £100 in a 10 to 15 litre pot. Semi-mature specimens (which provide immediate presence) cost £150 to £500 or more. Having a tree planted professionally (including staking and aftercare advice) adds approximately £50 to £100.
Other Common Garden Costs
Garden shed: £400 to £1,500 (including base and installation).
Garden tap: £80 to £150 (professionally installed).
Outdoor lighting: Solar path lights start from £20 to £50 for a set. Mains-powered LED garden spotlights cost £100 to £300 for a basic set. A professional garden lighting scheme (designed and installed by a landscape lighting specialist) costs £500 to £3,000 depending on scope.
Washing line/rotary dryer: £60 to £120 (including ground socket).
Artificial grass (if choosing this over real turf): £60 to £100 per square metre installed. A 40 to 50 square metre artificial lawn costs £2,400 to £5,000.
Total Garden Setup: Budget Summaries
Basic setup (functional garden): Fence panels, basic turf replacement, garden tap, shed, washing line — approximately £2,000 to £4,000.
Mid-range setup (attractive, usable garden): Quality fencing, good turf, natural stone patio, basic planting, shed, lighting, paths — approximately £5,000 to £12,000.
Premium setup (fully landscaped garden): Premium fencing, quality turf, porcelain or stone patio, composite decking, established planting, feature trees, professional lighting, garden room — approximately £15,000 to £40,000+.
Artificial Grass vs Real Turf: The Great New Build Debate
No discussion of new build gardens would be complete without addressing the artificial grass versus real turf debate, which generates strong opinions on both sides. Artificial grass has become enormously popular on new build estates, with some developments appearing almost entirely covered in the stuff. Here is an honest assessment of the pros and cons:
Arguments for Artificial Grass
Low maintenance: No mowing, feeding, watering, aerating, or weeding. For time-poor homeowners, this is a significant advantage. Maintenance is limited to occasional brushing, rinsing, and removal of leaves and debris.
Year-round appearance: Artificial grass looks green and neat throughout the year, including during winter when real lawns can look muddy, sparse, or mossy.
Durability: High-quality artificial grass withstands heavy foot traffic, children's play, and pet use without becoming worn or patchy. This is particularly relevant on small new build lawns where the entire area receives intensive use.
No mud: On new build developments where soil quality is poor and drainage is inadequate, real lawns often become muddy quagmires in winter. Artificial grass eliminates this problem, keeping children and pets clean and dry.
Overcoming poor soil: Because artificial grass is laid on a prepared aggregate sub-base rather than in soil, it sidesteps the soil quality issues that plague new build gardens entirely.
Arguments Against Artificial Grass
Environmental impact: Artificial grass is a plastic product, typically made from polypropylene or polyethylene. It does not support biodiversity — no insects, worms, or microorganisms live in it. It does not absorb carbon dioxide or produce oxygen. It contributes to the urban heat island effect (artificial grass can reach surface temperatures of 50°C or more in direct sunlight, compared to 25°C for real grass). At the end of its life (typically 10 to 15 years), it is difficult to recycle and usually goes to landfill. Some local councils have started to discourage or restrict artificial grass, and the Royal Horticultural Society has expressed concern about its impact on wildlife.
Heat retention: In summer, artificial grass becomes uncomfortably hot to the touch — hot enough to burn bare feet or cause discomfort for pets. This is a genuine issue that manufacturers are working to address but have not yet solved.
Drainage: While better artificial grass products have perforated backings that allow water to drain through, heavy rainfall can still cause surface pooling, particularly if the sub-base is not properly prepared. Drainage problems that affect real lawns will also affect artificial grass unless the underlying drainage is addressed.
Cost: Artificial grass is significantly more expensive than real turf to install. A professionally installed artificial lawn costs £60 to £100 per square metre (compared to £10 to £25 per square metre for real turf), meaning a 50 square metre lawn costs £3,000 to £5,000 for artificial versus £500 to £1,250 for real turf. While artificial grass saves on maintenance costs over time, it takes many years for these savings to offset the higher initial cost.
Appearance: Despite significant improvements in recent years, artificial grass is still visually distinguishable from real grass at close range. The best products (from brands like Namgrass, LazyLawn, or Easigrass) are very convincing from a distance but lack the subtle colour variations, seasonal changes, and natural imperfections of real grass.
Smell: Artificial grass can develop an unpleasant odour over time, particularly if you have dogs. Pet urine does not drain away as effectively as it does on real grass and can cause bacterial buildup in the infill material. Regular cleaning with an enzymatic pet cleaner is necessary to manage this.
Our Recommendation
For most new build gardens, we recommend starting with real turf but investing in proper soil preparation (as described above) to give the lawn the best chance of success. If, after a year or two, you find that the lawn is not thriving despite your best efforts — or if your lifestyle genuinely does not accommodate lawn maintenance — then artificial grass is a valid option. If you do go artificial, invest in a premium product (30mm to 40mm pile height, high stitch rate, UV-stabilised) from a reputable supplier, and ensure the sub-base is professionally prepared with adequate drainage.
Garden Rooms and Offices: Options, Costs, and Planning Permission
The garden room trend has exploded since 2020, driven by the shift to hybrid and remote working. For new build homeowners with limited indoor space, a garden room offers a dedicated workspace, gym, studio, or additional entertaining space without the cost and disruption of a house extension.
Types of Garden Room
Timber-frame garden rooms: The most common type, these range from basic timber cabins to highly insulated, fully finished rooms with electrical installations, heating, and double or triple glazing. Quality varies enormously. Budget timber rooms (such as those from Tiger Sheds or BillyOh) cost £3,000 to £6,000 but are generally not suitable for year-round use as offices. Mid-range insulated garden rooms (from companies like Garden Spaces, Cabin Master, or Green Retreats) cost £10,000 to £25,000 and are suitable for year-round use with heating. Premium garden rooms (from companies like Bakers Garden Buildings, Border Oak, or bespoke architects) cost £20,000 to £50,000+ for high-specification, architecturally designed structures.
Modular/pod garden rooms: Companies like Pod Space, Podmakers, and Studioni offer pre-fabricated modular rooms that are delivered and installed in a day. These typically cost £15,000 to £35,000 and offer a contemporary aesthetic with excellent insulation and finish quality.
SIPs (Structural Insulated Panels) buildings: SIPs garden rooms offer superior insulation and structural performance. They cost approximately £15,000 to £30,000 from specialist suppliers like SIP Building Systems or iSip.
Planning Permission for Garden Rooms
In most cases, a garden room falls under permitted development rights and does not require planning permission, provided it meets all of the following criteria: it is single-storey with a maximum eaves height of 2.5 metres; it is located in the rear garden (not in front of the principal elevation); it does not cover more than 50% of the total garden area; it is not within the curtilage of a listed building; it is not in certain conservation areas, national parks, or Areas of Outstanding Natural Beauty (where additional restrictions apply); and its maximum overall height does not exceed 4 metres (dual-pitched roof) or 3 metres (any other roof type), or 2.5 metres if within 2 metres of any boundary.
However — and this is critical for new build owners — many new build estates have restrictive covenants or estate management company rules that impose additional restrictions beyond planning legislation. Your estate management company may require approval for any outbuildings, specify maximum sizes, dictate materials and colours, or prohibit garden rooms entirely. Check your title deeds and estate management company rules before committing to a purchase.
If your garden room includes plumbing (such as a toilet or kitchen), electrical connections, or sleeping accommodation, building regulations approval may be required in addition to (or instead of) planning permission. Consult your local authority's planning department if you are unsure.
Driveways: What's Included, Upgrading, and Block Paving Costs
New build driveways are another area where the developer's standard specification often falls short of expectations. What you receive depends on your developer and your specific plot, but here are the common scenarios:
Tarmac driveway: The most common standard provision. A basic black tarmac driveway is functional but aesthetically uninspiring. Tarmac driveways on new builds are typically 100mm deep on a compacted sub-base and are adequate for domestic use. If you want to upgrade from tarmac, the cost of removing the existing tarmac and replacing it with an alternative surface ranges from £3,000 to £8,000 depending on the size and chosen material.
Block paving: Some higher-end developers provide block paving as standard. The quality and pattern vary — some developers use a simple running bond pattern in a basic grey block, while others offer more decorative options. If your developer does not provide block paving and you want to upgrade from tarmac or gravel, professionally installed block paving costs approximately £80 to £130 per square metre for a standard domestic driveway. For a typical two-car driveway of 30 to 40 square metres, this costs £2,400 to £5,200. Premium blocks (such as Marshalls Tegula, Brett Alpha Flow, or Tobermore Sienna) cost more than standard blocks.
Gravel or loose aggregate: Some plots, particularly those on rural or semi-rural developments, have gravel driveways as standard. Gravel is the cheapest driveway surface (approximately £20 to £40 per square metre installed) but requires regular maintenance — topping up, raking, and weed control — and can be noisy to drive on, difficult to walk on in heels, and prone to spreading onto paths and lawns.
Resin-bound surfacing: An increasingly popular upgrade, resin-bound surfacing combines aggregate with a UV-stable resin to create a smooth, permeable, low-maintenance surface. It costs approximately £60 to £90 per square metre installed. For a 30 to 40 square metre driveway, expect to pay £1,800 to £3,600. Resin-bound surfacing is available in a range of colours and aggregate types, from natural stone to recycled glass. It is SuDS-compliant (Sustainable Drainage Systems), meaning it does not require planning permission for front garden hardstanding, unlike non-permeable surfaces.
Planning Permission for Driveways
If you are replacing or installing a new driveway surface on a front garden or area that faces a highway, you may need planning permission if the new surface is non-permeable (i.e., it does not allow rainwater to drain through it). This is to comply with SuDS regulations and prevent surface water flooding. Permeable surfaces — including permeable block paving, resin-bound gravel, gravel, and grasscrete — do not require planning permission for domestic driveways of any size. Non-permeable surfaces (standard tarmac, non-permeable block paving, concrete) require planning permission if the area exceeds 5 square metres, unless the surface drains into a permeable area within the property boundary rather than onto the public highway.
Front Garden and Curb Appeal
The front garden is the face your home presents to the world, and on a new build estate — where houses are often identical or very similar — it is one of the primary ways to differentiate your home and create a sense of identity. However, front gardens on new build estates are often subject to estate management company rules and restrictive covenants that limit what you can change.
Common restrictions: No front fencing above a certain height (typically 600mm to 900mm); no caravans, motorhomes, or commercial vehicles parked on the drive; no satellite dishes on the front elevation; restrictions on the types of plants (some covenants prohibit tall hedging such as leylandii); no major changes to the front elevation appearance without estate management company approval; restrictions on bins being visible from the front. Check your title deeds and any estate management company rules before making changes to your front garden.
Effective front garden improvements (usually permitted): Replacing developer planting with more attractive plants and shrubs — consider evergreen structural plants (box hedging, lavender, pittosporum) combined with seasonal colour (roses, hydrangeas, alliums). Adding potted plants flanking the front door creates a welcoming entrance — consider bay trees, olive trees (increasingly popular), or topiary for a formal look. Path edging with a contrasting material (brick edging along a concrete path, for example) adds definition. A new front door mat or boot scraper. House number signage — a distinctive house number or name plaque. Outdoor wall lighting flanking the front door (from about £50 to £200 for a pair of quality wall lanterns, plus electrician installation).
Dealing with Neighbours on New Build Estates
New build estates present unique neighbourly challenges compared to established residential streets. Everyone has moved in at roughly the same time, boundaries are fresh and sometimes disputed, and the proximity of homes can lead to friction. Here is practical advice for the most common garden-related neighbour issues:
Shared Fences
Boundary ownership on new build estates should be clearly marked on the title plan, but disputes still arise. The title plan for your property will indicate which boundaries you own (usually marked with a 'T' mark pointing towards your side) and which are owned by your neighbour. If the fence posts are on your side of the boundary, the fence is yours to maintain. If they are on your neighbour's side, the fence is theirs. Where posts are shared or the boundary line runs through the middle of the fence, you have a party fence, and any changes or repairs should be agreed jointly.
Common fence disputes on new build estates include: disagreements about the style, height, or colour of fence panels (one neighbour wants closeboard, the other wants contemporary slatted); disputes about who should pay for fence panels when the developer only installed posts; and concerns about neighbours attaching items to your fence (trellises, hanging baskets, climbing plants). The best approach is always direct, friendly communication. Agree on fence style and share costs where boundaries are shared. If disputes cannot be resolved informally, mediation through your local council's mediation service is an option before legal action.
Overlooking
New build estates are designed to maximise housing density, and this inevitably means that gardens are overlooked by neighbouring windows. While there is no legal right to privacy in your garden (overlooking is not considered a nuisance in English law unless it is combined with harassment), there are practical steps you can take to increase privacy: install 1.83m (6ft) fence panels (the maximum height permitted under permitted development rights without planning permission); plant fast-growing screening plants along boundaries — bamboo (specifically clump-forming varieties like Fargesia, not invasive running bamboo like Phyllostachys), pleached trees, or mature hedging; add a pergola or sail shade over your patio area to block views from upper-floor windows; consider privacy screens or trellis panels with climbing plants on top of your existing fence (note: structures above 2 metres may require planning permission).
Noise
New build construction can mean that your neighbours are engaged in the same garden improvement works as you — and at the same time. Power tools, delivery lorries, and construction work at weekends can be frustrating. Be considerate with your own noise (restrict noisy work to reasonable hours, typically 8am to 6pm weekdays and 9am to 1pm Saturdays), and communicate with neighbours about particularly disruptive work.
Making the Most of a Small New Build Garden
New build gardens — particularly those on high-density urban or suburban developments — are often significantly smaller than the gardens on older properties. The average new build garden in England is approximately 40 to 60 square metres, compared to 150 to 200 square metres for homes built in the 1960s and 1970s. Making the most of a small space requires thoughtful design and clever use of every available area.
Zoning: Divide the garden into distinct functional zones, even if the total space is small. A patio area for dining, a lawn area for children's play, a planting border for visual interest, and a storage area for bins, bikes, and garden tools. Clearly defining these zones (with changes in level, surface material, or planting) creates the illusion of a larger, more varied space.
Vertical gardening: When floor space is limited, use vertical space. Wall-mounted planters, trellises with climbing plants, green walls, and hanging baskets all add greenery without consuming ground area. Climbing plants such as clematis, jasmine, honeysuckle, and trachelospermum (star jasmine) can cover a fence or wall with attractive, often fragrant foliage within one to two growing seasons.
Multifunctional elements: Choose garden features that serve more than one purpose. Raised beds with a wide cap can double as seating. A storage bench provides both seating and a place to store cushions and garden tools. A garden table with a built-in ice bucket serves for both dining and entertaining.
Mirrors: Outdoor mirrors (specifically designed for outdoor use — not standard indoor mirrors, which will deteriorate) create an illusion of depth and space. Placed on a boundary fence or wall and surrounded by planting, an outdoor mirror can appear to be a window or gateway into a larger space beyond. Outdoor mirrors cost approximately £50 to £200 from retailers like Cox & Cox, Not On The High Street, and Amazon.
Light colours: Use light-coloured paving, fencing, and furniture to make the space feel larger and brighter. Dark surfaces absorb light and make a small space feel enclosed, while light surfaces reflect light and create an open, airy feel.
Diagonal lines: Laying paving or decking diagonally (rather than parallel to the boundaries) creates a sense of movement and makes the space feel wider. Similarly, a diagonal lawn or path draws the eye across the widest dimension of the garden.
Garden Maintenance: Your First Year Calendar
Once your garden is set up, maintaining it properly during the first year is crucial for establishing healthy plants, a strong lawn, and long-lasting hard landscaping. Here is a month-by-month guide:
January-February: Plan the year ahead. Order bare-root plants and hedging for planting in February-March. Clean and repair fencing damaged by winter storms. Prune deciduous shrubs and trees while dormant. Apply a winter lawn feed if the weather is mild enough.
March-April: Begin mowing the lawn when the grass starts growing (first cut should be on the highest mower setting). Apply a spring lawn feed. Lay turf if needed (March is an excellent month for turfing). Plant container-grown shrubs, perennials, and grasses. Start sowing hardy annual seeds directly into borders. Repair any winter damage to hard landscaping.
May-June: Increase mowing frequency to weekly. Begin watering newly planted areas during dry spells. Apply mulch (bark, compost, or gravel) to borders to suppress weeds and retain moisture. Plant bedding plants for summer colour. Watch for pests (aphids, slugs, vine weevil) and treat as needed.
July-August: Water is the priority during summer — newly laid turf and newly planted shrubs need regular, deep watering during dry periods (at least twice a week in hot weather, applying approximately 10 to 15 litres per square metre each time). Deadhead flowering plants to encourage continued blooming. Mow the lawn weekly but raise the cutting height during hot, dry periods to reduce stress on the grass.
September-October: Aerate the lawn and apply autumn lawn feed. Overseed any bare patches in the lawn (September is the best month for lawn seeding in the UK). Plant spring-flowering bulbs (daffodils, tulips, crocuses, alliums). Plant bare-root trees, shrubs, and hedging from November onwards. Clear fallen leaves from the lawn and borders.
November-December: Continue planting bare-root specimens. Protect tender plants with fleece or mulch. Drain and store irrigation equipment if temperatures are expected to drop below freezing. Clean and oil garden tools. Review what worked well this year and plan improvements for next year.
For more detailed maintenance guidance, see our comprehensive guide to new build home maintenance tips, which covers both the house and garden. If your estate charges a service charge that includes communal landscaping, read our guide to service charges on new build developments to understand what is covered.
Common Developer Garden Complaints — And What You Can Do About Them
New build garden complaints are among the most frequent issues reported by homeowners on consumer forums and to warranty providers. Here are the most common complaints, with practical advice on resolution:
"The turf is dead/patchy/full of weeds within months." This is usually caused by poor soil quality, inadequate topsoil depth, or turf being laid at the wrong time of year or in poor conditions. If the turf was in obviously poor condition at handover (dead, yellow, or improperly laid), report this as a defect immediately with photographs. If the turf deteriorates after an initially reasonable handover, the developer will generally argue that maintenance is the homeowner's responsibility. Your options are to improve the soil and re-turf (as described above) or to consider artificial grass.
"The garden is waterlogged/floods after rain." If this is caused by a drainage defect (blocked, broken, or missing drainage connections), report it as a defect. If it is caused by soil compaction, you will need to address it yourself through aeration, French drains, or soil improvement. Document the problem with dated photographs and videos, particularly during and after heavy rain.
"There is rubble and construction waste in the soil." The NHBC standard requires that gardens be cleared of construction debris. If you find significant amounts of rubble, brick, concrete, or other waste in your garden soil, report this as a defect with photographs. The developer should remove the contaminated soil and replace it with clean topsoil.
"The fence posts are leaning/the fence is unstable." Report this as a defect immediately. Fence posts should be plumb and securely fixed in concrete foundations. Leaning posts within the first two years indicate poor installation and should be rectified by the developer.
"The patio is uneven/sinking/pooling water." If the developer-installed patio is sinking, cracking, or not draining properly within the defects period, report it as a defect. Paving should be laid on a properly compacted sub-base with falls (slopes) designed to direct water away from the house.
"The topsoil is only a couple of inches deep." Check your contract specification — if the developer committed to a specific topsoil depth and has not delivered it, this is a breach of contract. If the specification simply says "topsoil as necessary" or similar vague wording, it is difficult to challenge. In either case, importing additional topsoil is the practical solution.
Seasonal Planting Guide for New Build Gardens
Choosing the right plants for your new build garden depends on your soil type, aspect (which direction the garden faces), and the amount of time you want to spend on maintenance. Here are recommendations for four common new build garden scenarios:
South-Facing Garden (Full Sun)
Lucky you — a south-facing garden receives the most sunlight and opens up a wide range of planting options. Recommended plants include lavender (Lavandula angustifolia), rosemary, salvia, echinacea, agapanthus, ornamental grasses (Stipa tenuissima, Miscanthus), and climbing roses. For structure, consider olive trees (increasingly hardy in southern UK), bay trees, and photinia (Red Robin).
North-Facing Garden (Shade)
North-facing gardens receive limited direct sunlight, but many beautiful plants thrive in shade. Recommended plants include hostas, ferns (in great variety), hellebores, brunnera, pulmonaria, tiarella, and hydrangeas (particularly Hydrangea paniculata and H. arborescens, which tolerate shade better than H. macrophylla). For structure, consider bamboo (Fargesia murieliae), box (Buxus sempervirens), and Japanese maples (Acer palmatum), which prefer dappled shade.
Low-Maintenance Garden
If you want a garden that looks good with minimal effort, focus on evergreen structural plants, ground-cover perennials, and self-maintaining specimens. Recommended plants include pittosporum (excellent evergreen hedging), euonymus, hebe, pachysandra (ground cover), geranium (cranesbill — not the tender pelargonium), nepeta (catmint), and ornamental grasses. Combine these with a generous layer of bark mulch or decorative gravel to suppress weeds and reduce watering needs.
Wildlife-Friendly Garden
Supporting wildlife in your garden is increasingly important as new build developments replace habitat. Recommended wildlife-friendly plants include verbena bonariensis (excellent for butterflies), buddleia (butterfly bush), sedum (for bees in late summer), native hedgerow plants (hawthorn, blackthorn, dog rose, hazel), wildflower turf or seed mix for a section of the lawn, and berry-producing shrubs (pyracantha, cotoneaster, holly) for birds. Add a small wildlife pond (even a sunken washing-up bowl with some pebbles and a native aquatic plant), a log pile in a corner, and a hedgehog hole in one fence panel (a 13cm x 13cm gap at the base — many new build estates now include these as standard).
Final Thoughts: Patience, Planning, and Priorities
Transforming a new build garden from a bare plot into a beautiful outdoor living space is one of the most rewarding aspects of homeownership, but it requires patience, planning, and a realistic budget. The most common mistake is trying to do everything at once — which typically results in either overspending or cutting corners on quality.
Our recommended approach is to prioritise the essentials in year one (fencing for security and privacy, basic turf or ground cover, a functional patio area, and a garden tap), then add layers of planting, hard landscaping, and features over the following two to three years as your budget allows and as you learn how the garden performs through the seasons. The garden that looks most natural and beautiful is usually one that has been developed thoughtfully over time, not one that was installed all at once by a landscaping company.
Take the time to observe your garden through the seasons before making major decisions. Note where the sun falls at different times of day, which areas are sheltered and which are exposed, where water tends to collect, and how the prevailing wind affects different parts of the garden. This knowledge will inform better planting and design decisions than any garden plan drawn up before you have lived in the space.